


Starting with WWI, Americans were urged to grow their own food supply with gardens at home — and with 20 million at-home gardens, we the people produced about 40 percent of the nation’s fresh vegetables (NY Times). In those days, resilience and self-sufficiency were the most valuable traits to build.
More and more, we're noticing that people are turning to their own spaces, whether outdoor or indoors, to start growing fresh vegetables. And they're finding unique ways to upcycle materials to do it! We turned to social media to find some of our favorite examples of people building resilience with creative ways to grow produce at home.

1. Sprouting from Home
Beans, Grains, Legumes, Nuts and Seeds (we love mung beans and alfalfa!) (via @snowpeasophiesprout)
- Use a clean jar to soak seeds in water overnight, filled halfway up the jar (they're going to expand!). Cover the jar with a cloth and elastic band so that the seeds can breathe.
- In the morning, rinse the seeds in fresh water then drain the excess water.
- Rinse the seeds twice a day (in the morning and at night) draining excess water.
- A few days later, you should see that seeds have germinated and grown sprouts. Now's time to enjoy! Store them in the fridge in a container with holes in the lid to prevent moulding.
Flax and chia seeds (or any type of gelatinous seed) (via @the_smile_enthusiast)
- use 3 layers (strong enough to withstand water) of coffee filter as a grow medium
- Lay the filters in a container that fits the filters
- Mist the filters with filtered water - use a spray bottle if you have one!
- Sprinkle your seeds evenly along the coffee filter
- Mist seeds with water, getting them very moist, and cover to let them sprout in darkness
- Take a peek 3 times a day and make sure the grow medium is moist. Spray water when needed.
By day two, you should have sprouts! Once they look like they'e established roots (almost looks like mold) you can introduce the sprouts to light. Place your seeds near a window to get some indirect sunlight (make sure they're not placed in direct sunlight where the heat will dry them out).
- Keep misting them a few times a day, checking the bottom of the coffee filter to make sure it's moist but not soaked.
- You may want to add additional nutrients, like liquid sea minerals, to ensure they have the nutrients needed to grow.
You can eat your sprouts in 4 days! Peel them off the coffee filter. Enjoy them in salads, sandwiches and more. Keep them fresh in the fridge.
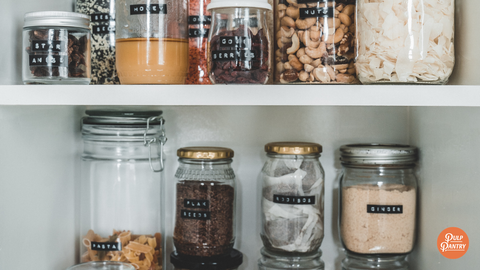
Sprouting in a Mason Jar (use for any seeds - alfalfa, broccoli, etc) (via @wellnessmama)
- Put two tablespoons of seeds in a wide-mouth mason jar and cover with a few inches of filtered water.
- Put on a lid with small holes scattered about (or use a coffee filter, cheesecloth with a rubber band!) and place the jar in a warm, dark place for 8-12 hours to begin the sprouting process (cabinet, or on top of your fridge).
- After 8-12 hours, drain the water and rinse with fresh water.
- Rest the mason jar upside down or at an angle inside a bowl so that remaining water can drain. Keep the jar in a slightly warm and mostly dark place.
- Rinse your sprouts 2 to 3 times a day, placing it back on its upright position after. After a few days, you should see the seeds sprout!
- Keep rinsing with the seeds in a dark place until they have sprouts around an inch long. Then, they can be exposed to a small amount of indirect sunlight.
- Your seeds are ready to eat once you see dark green leaves forming (about 3-4 days).
Storage: wait at least 12 hours from your last rinse so the remaining moisture drains out before replacing your porous lid with a regular, air-tight lid. Here's a great chance to use your carry-out containers as well.
Place in the refrigerator. Eat them as fresh as possible! They can hold for a week or two.

via @globalwakeup
2. Using Scraps to Re-Grow Vegetables Indoors
You can regrow your vegetables from scraps!
- Try with beetroots, carrots, spring onions, celery and more.
For odds and ends like onion ends, carrot tops, beet tops, place the veggie root-side down on a dish with a small layer (about an inch) of water.
Remember that carryout you had a few nights ago? Use your to-go containers as sprouting trays.
For spring onions and celery ends, place the root side in a mason jar with a small layer of water (enough to cover the roots).
Place the mason jar/ saucer on a sunny window and change the water every 2-3 days.
3. Upcycling Materials to Plant Seedlings

via @globalwakeup on Instagram.
You can use upcycled, biodegradable materials in your house to plant seedlings, which can then be planted directly into the soil.
Some of the things we've seen people using:
- Eggshells
- Toilet Paper Rolls
With these at-home activities, people are finding benefits far beyond the fresh food they're growing. People tell stories of the hope and joy they feel when watching their seeds sprout - truthfully, it's one of the most magical moments to see nature doing its thing.
What are you looking forward to growing next? Tag us and share your creations @pulppantry.

About Pulp Pantry:
Pulp Pantry turns overlooked resources like upcycled vegetable juice pulp into wholesome everyday snacks that make it convenient and delicious to eat more servings of vegetables and fiber.
Our newly launched Pulp Chips are vegetable-based, tortilla style chips made from fresh, upcycled vegetables as the first ingredient. Pulp Chips are a craveable better-for-you, better-for-the-planet snack with up to a full day's serving of fiber in each bag.
Try all of our four delicious flavors: Barbecue, Jalapeño Lime, Classic Sea Salt, Salt n' Vinegar.